I want to show how you can config Load Balancing with Haproxy on Ubuntu 14.04. More info about Load Balancing you can find here, something about Haproxy you find here.
What we need to config Load Balancing:
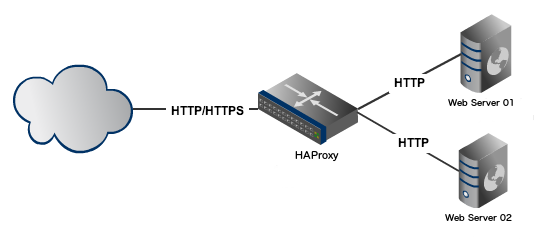
1. Load Balancer(Haproxy) on Ubuntu 14.04 – IP 192.168.1.15
2. Web1 on Ubuntu 14.04 – IP 192.168.1.16
3. Web2 on Ubuntu 14.04 – IP 192.168.1.17
Below screen our test network:
1. Config Load Balancer/ Web1/Web2:
After installing Ubuntu on Load Balancer we need config some features.


2.Config Haproxy:
apt-get install haproxy
Afer installation, we can check haproxy version:
haproxy -v
sudo nano /etc/default/haproxy
inside we must change Enabled=0 on Enabled=1

Now we can start haproxy service
sudo service haproxy start
Next we backup original config file.
sudo cp /etc/haproxy/haproxy.cfg /etc/haproxy/haproxy.cfg.original
Inside the file we must write this parameters:

3.Config LAMP on the Web1 and Web2:

sudo apt-get install mysql-server php5-mysql
During the installation, server will ask about root password.
Next we install php.
sudo apt-get install php5 libapache2-mod-php5 php5-mcrypt
Next we change below file.
sudo nano /etc/apache2/mods-enabled/dir.conf
In this file we save this:

At the end we must restart apache2
sudo service apache2 restart
After installation we check if the php is running.
sudo nano /var/www/html/info.php
we add this code:

We can check if PHP is ok.
http://localhost/info.php
We get this:

4.Configure LAN settings.
# The primary network interface
auto eth0
# DHCP not needed
# iface eth0 inet dhcp
iface eth0 inet static
address 192.168.1.15
netmask 255.255.255.0
network 192.168.1.0
broadcast 192.168.1.255
gateway 192.168.1.1
dns-nameservers 8.8.8.8
Web1:
# The primary network interface
auto eth0
# DHCP not needed
# iface eth0 inet dhcp
iface eth0 inet static
address 192.168.1.16
netmask 255.255.255.0
network 192.168.1.0
broadcast 192.168.1.255
gateway 192.168.1.1
dns-nameservers 8.8.8.8
Web2:
# The primary network interface
auto eth0
# DHCP not needed
# iface eth0 inet dhcp
iface eth0 inet static
address 192.168.1.17
netmask 255.255.255.0
network 192.168.1.0
broadcast 192.168.1.255
gateway 192.168.1.1
dns-nameservers 8.8.8.8
On the Web1 with IP- 192.168.205.16, append below line as:
sudo sh -c „echo Hostname: web1 (192.168.205.16) >> /var/www/index.html”
On the Web2 with IP- 192.168.205.17, append below line as:
sudo sh -c „echo Hostname: web2 (192.168.205.17) >> /var/www/index.html”
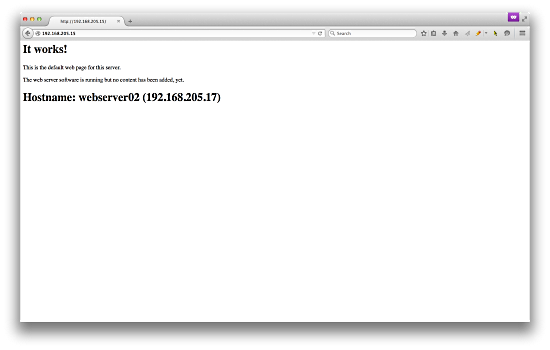
For the first time when I visit http://192.168.205.15 , I get:

And for the second time, i.e. when I refresh the page, I get:
Dziękuję Ci, za poświęcony czas na przeczytanie tego artykułu. Jeśli był on dla Ciebie przydatny, to gorąco zachęcam Cię do zapisania się na mój newsletter, jeżeli jeszcze Cię tam nie ma. Proszę Cię także o “polubienie” mojego bloga na Facebooku oraz kanału na YouTube – pomoże mi to dotrzeć do nowych odbiorców. Raz w tygodniu (niedziela punkt 17.00) otrzymasz powiadomienia o nowych artykułach / projektach zanim staną się publiczne. Możesz również pozostawić całkowicie anonimowy pomysł na wpis/nagranie.
Link do formularza tutaj: https://beitadmin.pl/pomysly
Pozostaw również komentarz lub napisz do mnie wiadomość odpisuję na każdą, jeżeli Masz jakieś pytania:).